
Any PDF in your Document Library can go out for signature. You add recipients, place fields on the pages, set the order and expiry, and send: each recipient gets a private signing link.
Before you start
- You need the e-sign permission (Editors and Workspace Admins have it by default).
- Sending consumes one envelope credit; a preflight note shows your balance before you commit.
- Word documents can't be sent directly: convert them to PDF first from the document's page.
Open the send surface
- Open the document and switch to its E-sign tab.
- Click Send for signature. The current version of the document is pinned to the envelope; later edits create new versions and don't change what recipients see.
For contracts written in the builder, Send for signature in the builder does the setup for you: it creates one recipient per signing party and pre-places their fields from the contract's signature placeholders.
Add recipients
- In the recipients rail, add each signer: the people who must sign.
- Optionally add a countersigner: your side's signature, always collected last, after every signer has signed.
- Optionally add viewers: they get a read-only link and notifications, with nothing to sign.
Email is optional per recipient. If you skip it, the form tells you the consequence up front: no invitation is sent, you copy the link and deliver it yourself, and the recipient cannot request a replacement link if theirs stops working. Recipients with an email get their invitation automatically.
Place fields
- Pick a field type: signature, text, date, or checkbox, and choose which recipient it belongs to.
- Drag it onto the page and position it. Selected fields can be moved, resized, or reassigned to another recipient.
- To place several copies in a row, hold Shift while placing: the tool stays armed.
- For a field that repeats on every page (initials, for example), select it and use All pages.
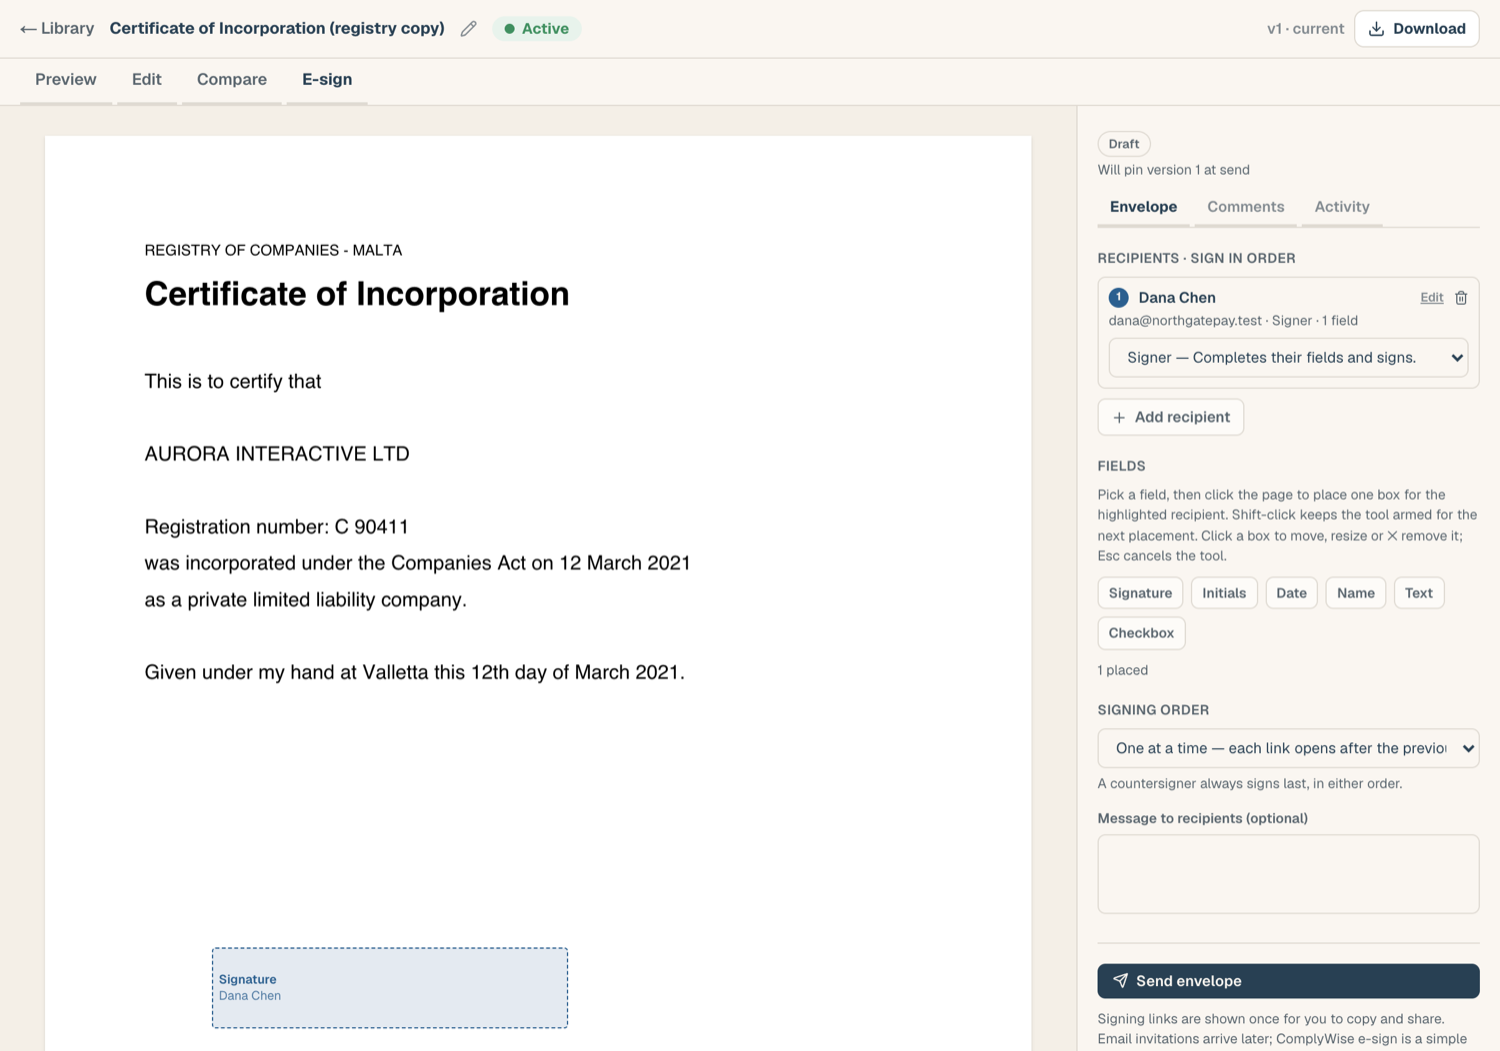
Set order, expiry, and message
- Signing order sits beside the Recipients heading. The default is All at once: every recipient can sign immediately. Switch to One at a time, in the listed order and each recipient is only invited when it's their turn. A countersigner is always last, in either order.
- Expiry: links expire after 7, 14, 30, 60, or 90 days (30 by default).
- Message: an optional note shown to every recipient and included in invitations.
Send
- Click Send envelope and confirm.
- Each recipient's card now shows their private link with Copy and Open, and a notice above the list offers Copy all links. Copy any links you're delivering yourself now: for security, raw links aren't stored, so once you close the notice the only way to get a link again is Reissue link on the card, which invalidates the previous one.
- Invitation emails go out to every recipient with an address.
From here the envelope is frozen: recipients and fields can't change (except adding or correcting an email). See Manage a live envelope for what you can still do.